
Initially this review was going to cover both Snap! and Snap! Empower, but I ran into a major issue with Snap! What was it?
Snap! does not work with a 64 bit Windows OS that has/and you using PowerPoint 2010 – since Snap! interfaces directly with the product (ribbon? who knows, I never got to see it). Why? Great question and no answer.
Lectora’s Snap! is not the only product which has an issue with a 64 bit Windows computer but in combination with PPT 2010, I’m unaware of any other. Many products in the general market do not offer 64 bit but they still work in the 64 bit – by using the 32 bit driver. I am unsure if Snap! does work with 64 bit and PowerPoint 2007 or below, because I have PowerPoint 2010 and a Windows 64 bit computer. So, no Snap!
Lectora Snap! Empower on the other hand does work, since it is a self-contained product and does not directly go into PowerPoint 2010 (but you can upload PowerPoint slides into it). This review then is all about Snap! Empower, so sit back and read or stare – your choice!
Snap! Empower
When I looked at the product, I immediately thought on the song by Snap – called Power! Maybe they should make this their theme song – just spit-balling here.
Good
- Robust feature set – properties, elements, templates, video editing, image editing
- One click Publish
- Lots of video options for output (but a couple make no sense)
- Over 70 templates including ones for games, quiz games, interactions, components
- Ribbon header design
- Library pulls in your video, audio, flash and image files right from your video,image, flash, audio folders on your computer – GREAT IDEA – although I wish they added HTML5

- Easy to move images right into the blocks on the templates
- Spelling – I am always surprised at the number of authoring tools who do not have this feature
- Page analyzer – estimated time load depending on your speed – again a great idea!
Average
- Right click capability
- One click share to Facebook, Linkedin, Twitter, YouTube or their own Snap! Channel – of course if your company blocks all social media sites – I guess you are hitting the Snap! Channel first
- Audio recorder and adding audio
- Text, shape, button and similar
Poor
- Timeline right on the main window – it was distracting – put it below and make it smaller – If I want to expand it in size – I will
- Duration (same issue as above) – but keep size
 Previewing – it offers it but the terms and icons are strange – “pages” “project” – you only know it refers to preview when you hover over it

- Initial helpful tips – I wanted to punch my screen – dump the popups that go all over the place when you click certain items – first time around
- A couple of the publish as mobile video devices – Palm Tre Pro? Blackberry Curve? Blackberry Touch? Droid X (very popular in 2010) – Why not add the handheld phone from the early 90s?
- Missing publish as a mobile video device for iPhone 5 (has it though for iPhone 3 and iPhone 4, but not 4S)
- Offers the general publish as a mobile video device at 100% – but are they referring to all mobile devices or tablets or portable gaming players?
- When you move over a video MP4 file onto your page, it converts to FLV video – but when you decide to publish and select video – you can output the entire project as a MP4
Here we Go
When you enter the product for the first time you see an opening screen offering you to select any of the sample projects or jump right in. Going forward – as in each time you open up Empower – you can continue to see the screen or select “don’t show it again”.
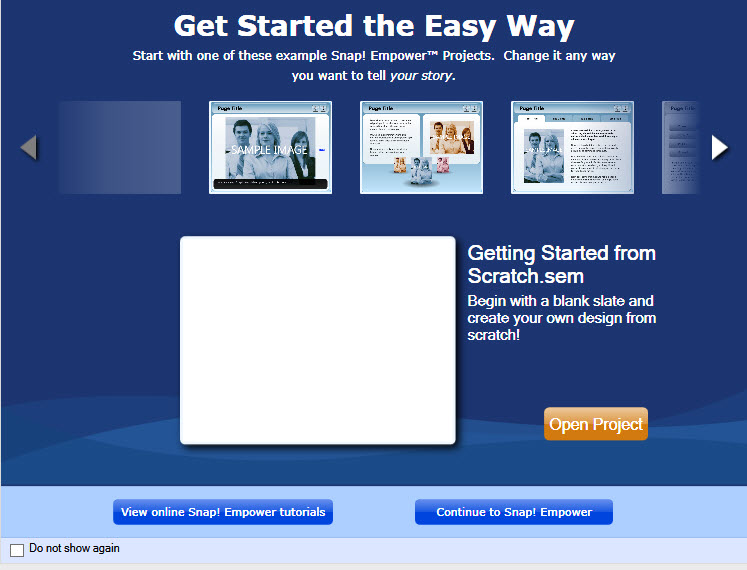
The first time, I went right with one of the project templates. It was simple enough and I was able to pull one of my images “Sigmund the sea monster” right into one of the sample images. However, after that, I could not stick another image into the other “sample image” blocks.
After looking around at the elements and clicking on various items, I realized that the template itself “Revolver-1” (the initial one is “revolver” but when I saved it. I added the “1”) was the culprit.
So I had to click the “”lock” to unlock it and then I could edit it.
Oh, wait did I mention the “lock” and “eyeball”? Of course not, but now I am. Unless you have used a product like Photoshop or other programs that have layers, etc. – you wouldn’t know about the ol “lock” and “eyeball” feature.
- Eyeball open
 – element is viewable on the page
 - Eyeball closed with a red bar across it
 – element not visible on the page
 - Lock closed
 – element is locked, you cannot change it on the page
 - Lock unlocked
 – element is unlocked – can make changes
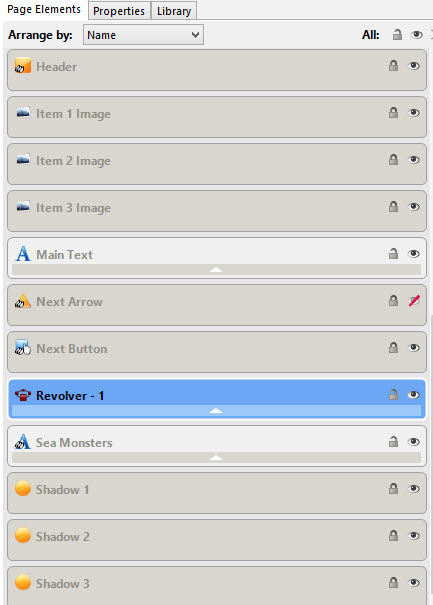
As you can see, the “Revolver-1” has changed color to lite blue. Now you can edit. Click the white arrow (hard to see, but trust me it is there) and the window expands to:
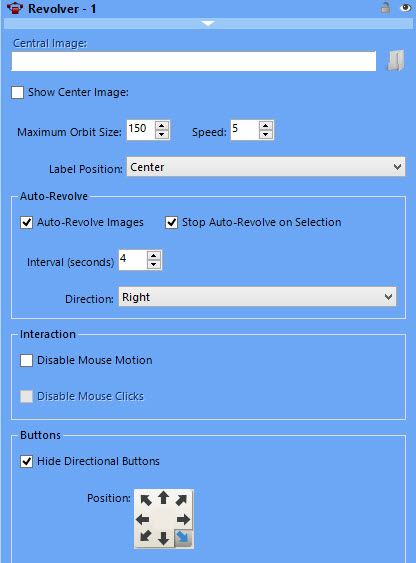
Now you can make your changes. A slight issue I had with Empower! is that when I wanted to change my “central image” instead of opening up the library – where all my images were located (and again, pulled from my image folder on my computer) – the product instead did the “browse” requiring me to look for my images.
While you can go to your “library” and select the image and then move it onto the image it is replacing it – the easiness is not so simple – especially when you have the Revolver-1 element open.
I’d rather be able to right click the image I am changing on my page window and just insert the other one, then go through the this element dialog.
Not all the element dialogs offer as many changes as the one that is visible, but you get the idea.
Speaking of funkiness, changing the name of my page header added a new level of frustration. For the longest time I couldn’t figure out how to change it. After several minutes, I realized I had to go into my elements, find “main title” and then change. Again, how about a simple right click?
When you are done with your changes and ready to move onto another element to tweak, make sure you click the white arrow to close the dialog and then click the “lock” to close it, otherwise you see how angry you can get – I bet really angry!
Once it is locked, you can now go back and select another element or in many cases simply click on the element on the page and make the changes. I was able to do this with my text field.
I think you can see how the product goes from nifty to irritating all in one quick moment. Overall, I thought the page look was doable and loved that they went with project-page-etc. rather than the “slides” thing – which I hate.
A ribbon for you
![]()
- Save – Save the project
- Page(s) – Preview pages – honestly there could be a better icon for it
- Project – Preview project – similar issue as Page(s)
- Publish – Publish as a Single SWF, Publish as a video, Publish as a video on a mobile device, One click share to Facebook, Linkedin, Twitter, YouTube or Snap! Channel
- Text – Self explanatory
- Shape – Oval, rectangle, triangle, block arrow, caption bubble
- Button – Basic, text, graphic, invisible
- Image – Add an image, again browse option on your computer but does not go right to your Library tab – images
- Video – similar to above, but adding video
- Audio – Add audio to the page, similar to above issue
- Flash – Add flash to a page, similar issue i.e browse instead of going to our library
- Record audio – Dialog box appears, easy to record
- Video editor – Play, Set Start, Set End, Ouput options: Video & Audio, Video only, Audio only, Preview
- Image editor – Zoom, Crop, Brightness, Resize, Rotate, Flip, Undo, Save and Close
- Feedback – uh, leave feedback
Missing the Pop
- No audio editing – makes no sense when you have video and image editors
Sizzling
The product comes with
- Over 100 templates – Some are cool, some are not
- 77 components – Beyond the common ones include: Whiteboard, Fiery Text (that one was fun), Form Calendar, Animation (Motion XML), Media RSS Feed (more in one sec.), RSS scroller (includes option for Media Feed), Video Feed, Video Text Mask
- Media RSS Feed – comes with the following- BBC, ABC, ESPN – you can also add your own “custom feed” – not sure why ESPN was selected – I guess they think everyone loves sports or ESPN. I’d rather have the ability to add multiple “custom feeds” in the dialog box, but that is not possible
- Video Feed – again comes with a few: Link TV, AC360, Global Oneness Project Films (huh?), Discovery, NASA and you also can add your own custom feed. I want to know who picked these video feeds. I mean honestly, who thinks NASA when deciding on video feeds?
Bottom Line
Lectora compares this product to Articulate Engage and frankly I think that is a mistake. Snap! Empower blows away Engage on multiple levels and as such I’d put this product against some of the rapid content authoring tools that offer simulation options.
Toss in SCORM 1.2/2004, add a few more standard features and make changes to some of the capabilities and this product will be competitive against some of its higher priced authoring tool brethren. But let’s not stop there.
Want to really empower it? Go SaaS.
As for Snap! make it work with PowerPoint 2010 in combination with Windows 64 bit computers.
Because right now, you are missing the power,
To make it crackle and pop.
E-Learning 24/7
Thanks for the detailed review!
As a member of the design team that created Snap! Empower, it’s always interesting to see how our software is received in the wild. We appreciate you highlighting a number of features that we’re really proud of, and also holding our feet to the fire on possible improvements. This type of feedback is what allows us to continue to create high quality products.
It seems that the part of the UI you had the most trouble with is the Page Elements tab. Locked items in particular are a puzzle to many new users, and could probably be introduced more gracefully in the application. However, for more experienced users these features are critical, so I thought it might help if I offered a few tips and describe how these features are often used.
The Page Elements tab is essentially a list view of everything in the WYSIWYG Page Editor. The ability to lock and hide elements is designed as a convenience feature, and is entirely optional. As you pointed out, this is not unlike the concept of Layers in Photoshop. Once particular design elements are in place, such as a background graphic or global navigation buttons, lock those in the Page Elements tab so they are not accidentally moved when adjusting other elements on the Page.
Here are a few additional tips for anyone having trouble getting comfortable with the Page Elements tab:
1. Use the lock, eyeball, and expand icons at the very top-right of the Page Elements list to toggle everything in the list at once.
2. Use the Page Elements tab primarily for organizing and selecting elements that are otherwise difficult to select on the Page Editor. Focus primarily on the Page Editor and Properties tab when making edits and changes.
3. As a best practice, double-click on any unlocked element in the Page Elements tab to re-name it. Especially when building content from scratch, it’s extremely helpful to have a list full of meaningful names.
Hope that helps!
Chris Varley
Design Director
No I understood the Page properties, etc. it is just that the product is geared towards anybody and unless you have experience with layers that use the eye open, etc. – you will not know how to do it in an easy manner. People who see layers similar to this use products such as Photoshop for example.